Editing Tilesets
To edit a tileset it needs to be opened explicitly for editing. External tilesets can be opened via the File menu, but in general the quickest way to edit the tileset when it is already open in the Tilesets view is to click the small Edit Tileset button in the tool bar below the tileset.
Two Types of Tileset
A tileset is a collection of tiles. Tiled currently supports two types of tilesets, which are chosen when creating a new tileset:
- Based on Tileset Image
This tileset defines a fixed size for all tiles and the image from which these tiles are supposed to be cut. In addition it supports a margin around the tiles and a spacing between the tiles, which allows for using tileset images that either happen to have space between or around their tiles or those that have extruded the border pixels of each tile to avoid color bleeding.
- Collection of Images
In this type of tileset each tile refers to its own image file. It is useful when the tiles aren’t the same size, or when the packing of tiles into a texture is done later on.
Regardless of the type of tileset, you can associate a lot of meta- information with it and its tiles. Some of this information can be for use in your game, like collision information and animations. Other information is primarily meant for certain editing tools.
Note
A tileset can be either embedded in a map file or saved externally. Since Tiled 1.0, the default and recommended approach is to save your tilesets to their own file. This simplifies your workflow since it makes sure any meta-information is shared between all maps using the same tileset.
Tileset Properties
You can access the tileset properties by using the menu action Tileset > Tileset Properties.
- Name
The name of the tileset. Used to identify the tileset in the Tilesets view when editing a map.
- Object Alignment
The alignment to use for tile objects referring to tiles from this tileset. This affects the placement of the tile relative to the position of the object (the origin) and is also the location around which the rotation is applied.
Possible values are: Unspecified (the default), Top Left, Top, Top Right, Left, Center, Right, Bottom Left, Bottom and Bottom Right. When unspecified, tile object alignment is generally Bottom Left, except for Isometric maps where it is Bottom.
- Drawing Offset
A drawing offset in pixels, applied when rendering any tile from the tileset (as part of tile layers or as tile objects). This is can be useful to make your tiles align to the grid.
- Background Color
A background color for the tileset, which can be set in case the default dark-gray background is not suitable for your tiles.
- Orientation
When the tileset contains isometric tiles, you can set this to Isometric. This value, along with the Grid Width and Grid Height properties, is taken into account by overlays rendered on top of the tiles. This helps for example when specifying Terrain Information. It also affects the orientation used by the Tile Collision Editor.
- Columns
This is a read-only property for tilesets based on a tileset image, but for image collection tilesets you can control the number of columns used when displaying the tileset here.
- Image
This property only exists for tilesets based on a tileset image. Selecting the value field will show an Edit… button, allowing you to change the parameters relevant to cutting the tiles from the image.
Of course, as with most data types in Tiled, you can also associate Custom Properties with the tileset.
Tile Properties
- ID
The ID of the tile in the tileset (read-only)
- Class
This property refers to custom classes defined in the Custom Types Editor. See the section about Typed Tiles for more information.
- Width and Height
The size of the tile (read-only)
- Probability
Represents a relative probability that this tile will get chosen out of multiple options. This value is used in Random Mode and by the Terrain Brush.
- Image
Only relevant for tiles that are part of image collection tilesets, this shows the image file of the tile and allows you to change it.
Terrain Information
Terrain information can be added to a tileset to enable the use of the Terrain Brush. See the section about defining terrain information.
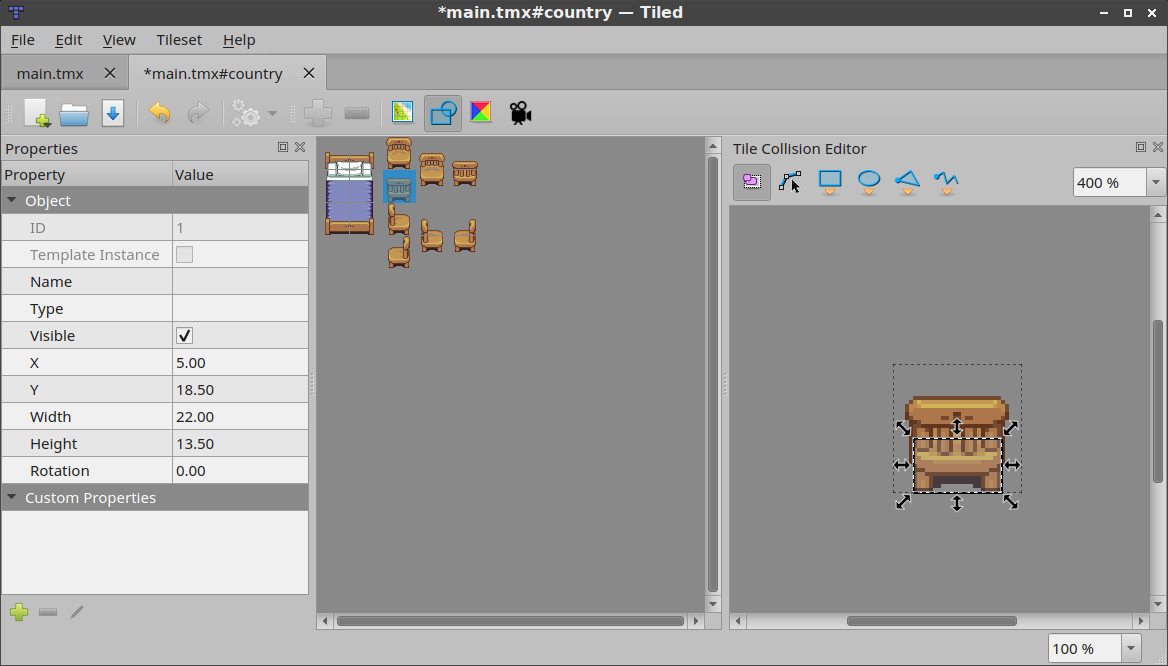
Tile Collision Editor
The tile collision editor is available by clicking the Tile Collision Editor
 button on the tool bar. This will open a
view where you can create and edit shapes on the tile. You can also
associate custom properties with each shape.
button on the tool bar. This will open a
view where you can create and edit shapes on the tile. You can also
associate custom properties with each shape.
Usually these shapes define collision information for a certain sprite or for a tile representing level geometry, but of course you could also use them to add certain hot-spots to your sprites like for particle emitters or the source of gunshots.
Tile Collision Editor
To be able to easily check whether your tiles have the right collision shapes set up, they can be rendered on the map. To enable this, check Show Tile Collision Shapes in the View menu. The collision shapes are rendered for both tile layers and tile objects.
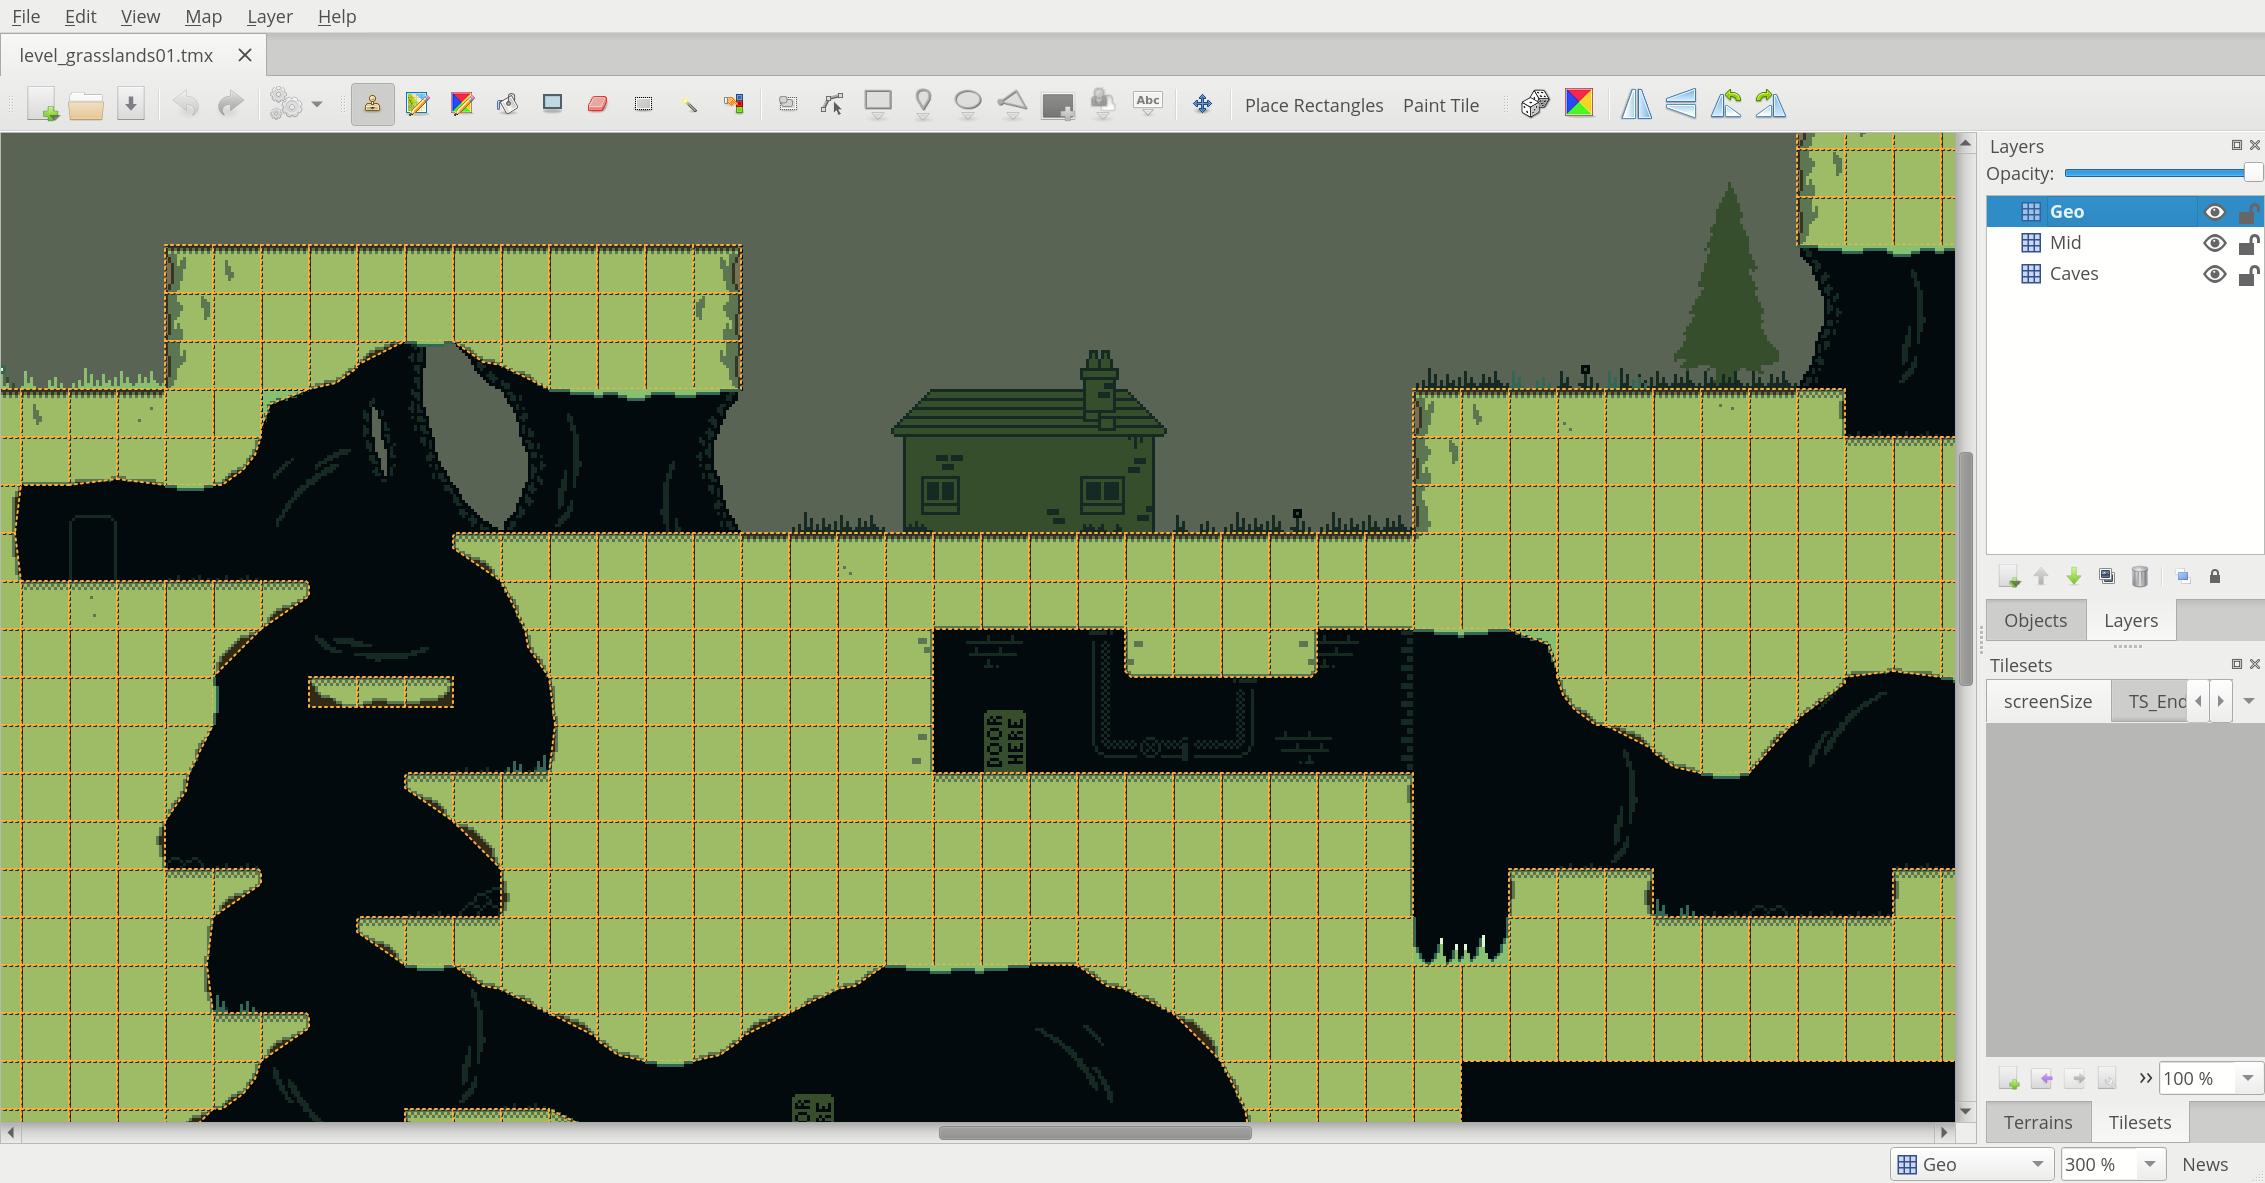
Collision shapes rendered on the map. This map is from Owyn’s Adventure.
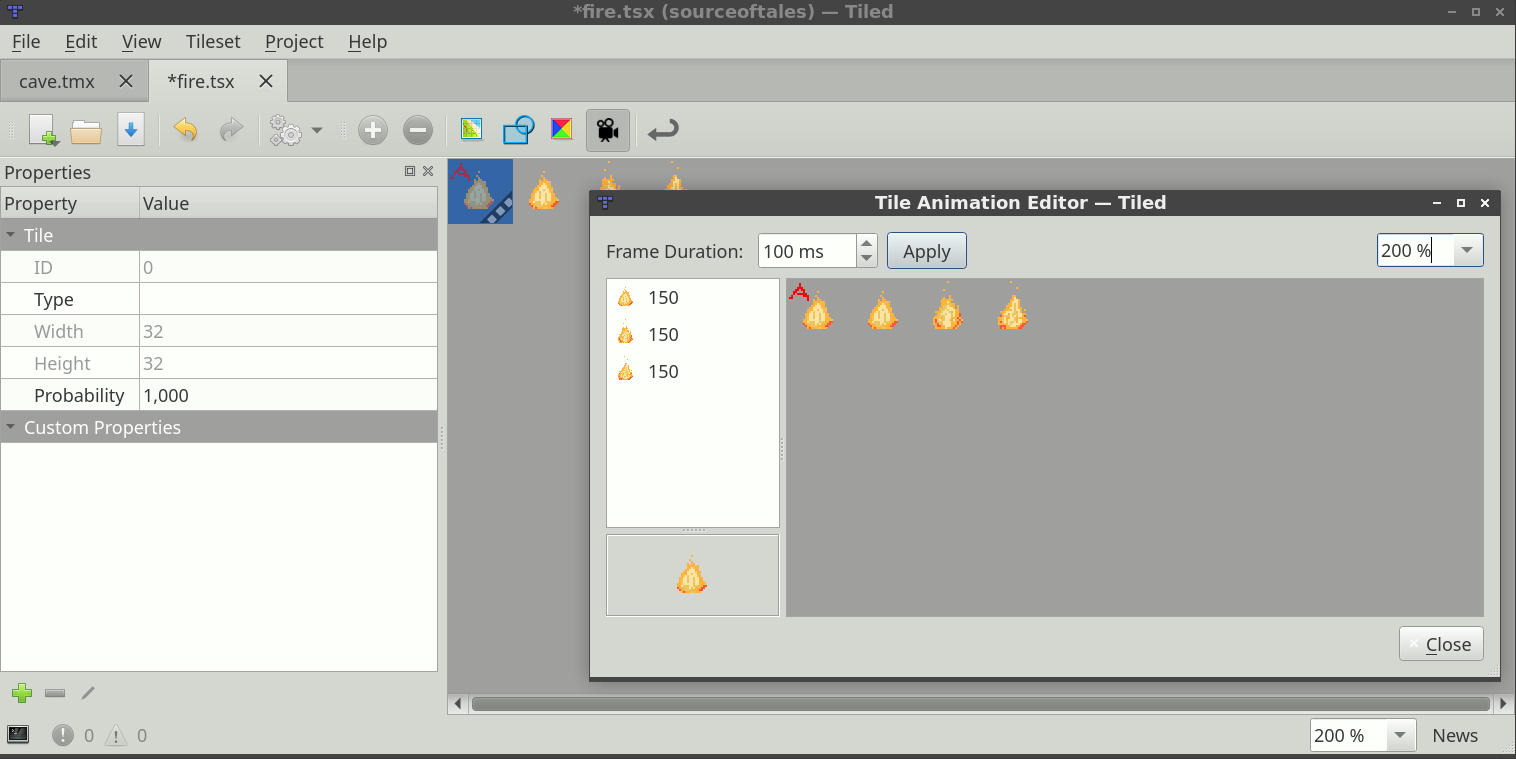
Tile Animation Editor
The tile animation editor allows defining a single linear looping
animation with each tile by referring to other tiles in the tileset as
its frames. Open it by clicking the Tile Animation Editor  button.
Tile animations can be live-previewed in Tiled, which is useful for getting a feeling of what it would look like in-game. The preview can be turned on or off via View > Show Tile Animations.
Tile Animation Editor
The following steps allow to add or edit a tile animation:
Select the tile in the main Tiled window. This will make the Tile Animation Editor window show the (initially empty) animation associated with that tile, along with all other tiles from the tileset.
Drag tiles from the tileset view in the Tile Animation Editor into the list on the left to add animation frames. You can drag multiple tiles at the same time. Each new frame gets a default duration of 100 ms (or other value when set using the Frame Duration field at the top).
Double-click on the duration of a frame to change it.
Drag frames around in the list to reorder them.
A preview of the animation shows in the bottom left corner.
You can change the duration of multiple frames at once by selecting them, changing the value in the Frame Duration field and then clicking Apply.