Using Terrains
When editing a tile map, sometimes we don’t think in terms of tiles but rather in terms of terrains - areas of tiles with transitions to other kinds of tiles. Say we want to draw a patch of grass, a road or a certain platform. In this case, manually choosing the right tiles for the various transitions or connections quickly gets tedious. The Terrain Brush was added to make editing tile maps easier in such cases.
Warning
While Tiled has supported terrains since version 0.9 and later supported a similar feature called “Wang tiles” since version 1.1, both features were unified and extended in Tiled 1.5. As a result, terrain information defined in Tiled 1.5 can’t be used by older versions.
The Terrain Brush relies on the tileset providing one or more Terrain Sets - sets of tiles labeled according to their terrain layouts. Tiled supports the following terrain sets:
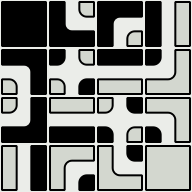
- Corner Set
Tiles that needs to match neighboring tiles at their corners, with a transition from one type of terrain to another in between. A complete set with 2 terrains has 16 tiles.
- Edge Set
Tiles that need to match neighboring tiles at their sides. This is common for roads, fences or platforms. A complete set with 2 terrains has 16 tiles.
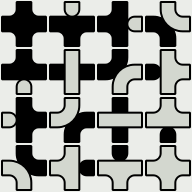
- Mixed Set
Tiles that rely on matching neighboring tiles using both their corners and sides. This allows a tileset to provide more variation, at the cost of needing significantly more tiles. A complete set with 2 terrains has 256 tiles, but reduced sets like the 47-tile Blob tileset can be used with this type as well.
Based on the information in a terrain set, the Terrain Brush can understand the map and automatically choose the right tiles when making edits. When necessary, it also adjusts neighboring tiles to make sure they correctly connect to the modified area. A terrain set can contain up to 254 terrains.
The Stamp Brush, as well as the Bucket Fill Tool and the Shape Fill Tool, also have a mode where they can fill an area with random terrain.
Define the Terrain Information
Creating the Terrain Set
First of all, switch to the tileset file. If you’re looking at the map and have the tileset selected, you can do this by clicking the small Edit Tileset button below the Tilesets view.
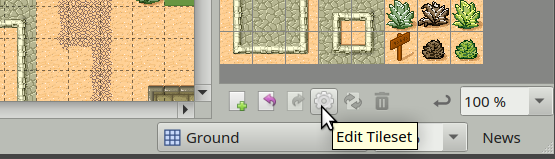
Edit Tileset button
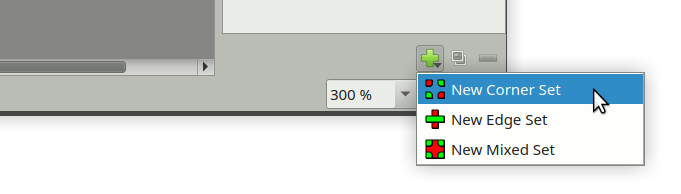
Then, activate the terrain editing mode by clicking on the Terrain Sets
 button on the tool bar. With this mode activated, the Terrain Sets
view will become visible, with a button to add a new set. In this example,
we’ll define a Corner Set.
button on the tool bar. With this mode activated, the Terrain Sets
view will become visible, with a button to add a new set. In this example,
we’ll define a Corner Set.
Adding a Terrain Set
When adding a terrain set, the name of the new set will automatically get focus. Give the set a recognizable name, in the example we’ll type “Desert Ground”. We can also set one of the tiles as the icon of the set by right-clicking a tile and choosing “Use as Terrain Set Image”.
Adding Terrains
The new set will have one terrain added by default. If we already know we need additional ones, click the Add Terrain button to add more.
Each terrain has a name, color and can have one of the tiles as its icon it to make it more recognizable. Double-click the terrain to edit its name. To change the color, right-click the terrain and choose “Pick Custom Color”. To assign an icon, select the terrain and then right-click a tile, choosing “Use as Terrain Image”.
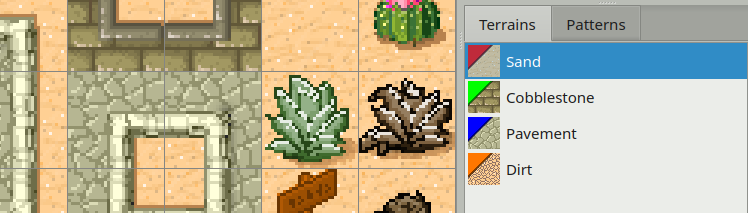
Our Terrains
Note

We generally don’t need to define an explicit terrain for “empty tiles”. If you have tiles transitioning to nothing, it should be enough to not mark those areas.
(Example © Game Shovel LLC, license: MIT)
With our terrains set up we’re ready to mark each of our tiles.
Marking the Tiles
Note that for a Corner Set, we can only mark the corners of the tiles. For a Edge Set, we’re limited to marking the edges of our tiles. If we need both we need to use a Mixed Set. If it turns out that we chose the wrong type of terrain set, we can still change the type in the Properties view (right-click the terrain set and choose Terrain Set Properties…).
With the terrain we want to mark selected, click and drag to mark the regions of the tiles that match this terrain.
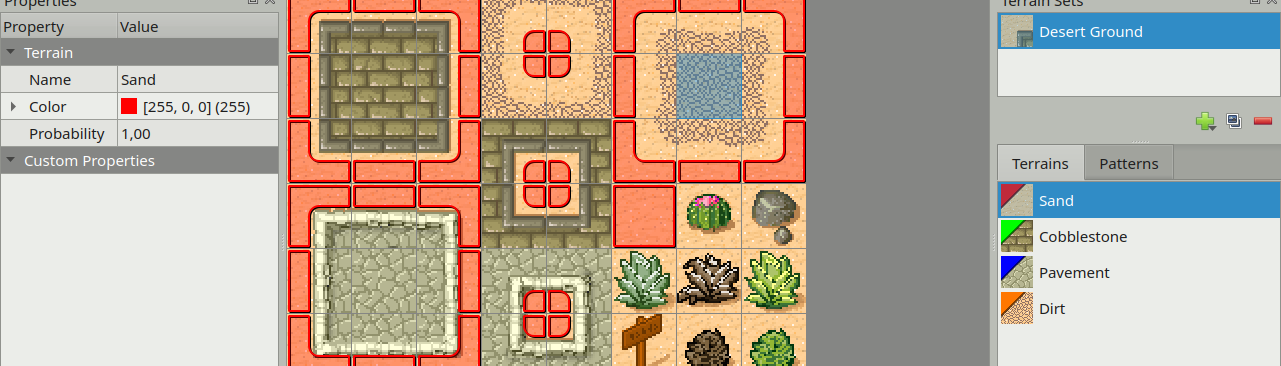
Here we have marked all the sandy corners in our example tileset.
If you make a mistake, just use Undo (or press Ctrl+Z). Or if you
notice a mistake later, either use Erase Terrain to clear a terrain type
from a corner or select the correct terrain type and paint over it. Each
corner can only have one type of terrain associated with it.
Now do the same for each of the other terrain types. Eventually you’ll have marked all tiles apart from the special objects.
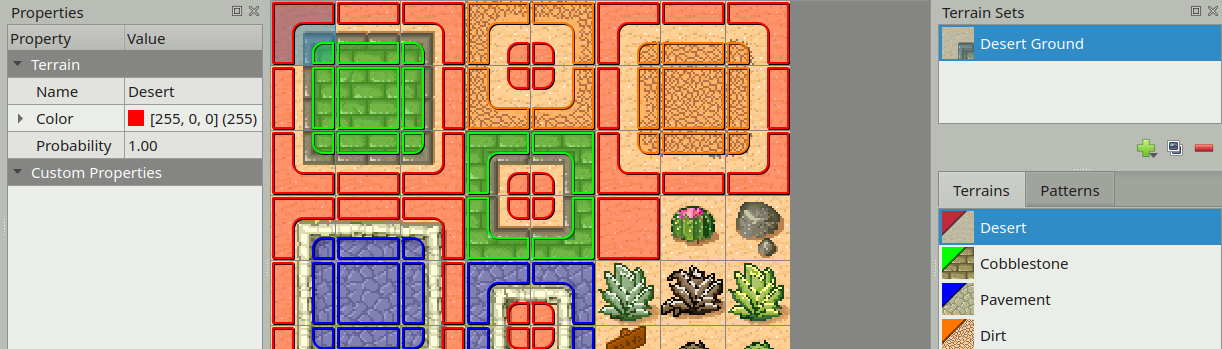
We’re done marking the terrain of our tiles.
Patterns View
Next to the Terrains tab there’s also a Patterns tab. This view can be useful when marking complete sets, since it can highlight still missing patterns. Each pattern which already occurs on a tile in the tileset is darkened, to make the missing patterns stand out. Note though, that it is not necessary for a terrain set to have all possible patterns, especially when using more than 2 terrains.
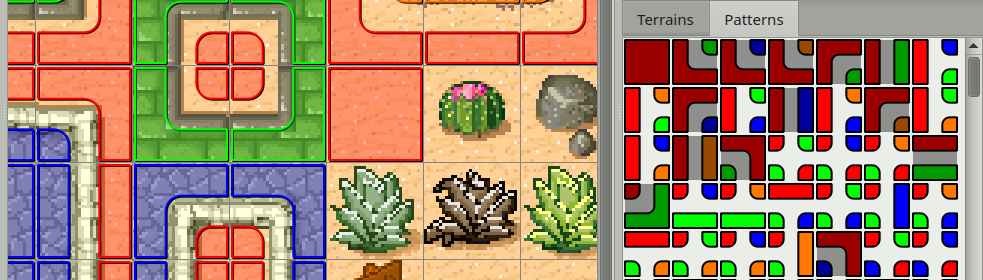
Patterns view, showing all possible combinations in the set.
Editing with the Terrain Brush
Now you can disable the Terrain Sets mode by clicking the tool bar
button again. Then switch back to the map and activate the Terrain Sets
window. Select the terrain set we have just set up, so we can use its
terrains.
Click on the Sand terrain and try to paint. You may immediately notice that nothing is happening. This is because there are no other tiles on the map yet, so the terrain tool doesn’t really know how to help (because we also have no transitions to “nothing” in our tileset). There are two ways out of this:
We can hold
Ctrl(Commandon a Mac) to paint a slightly larger area. This way we will paint at least a single tile filled with the selected terrain, though this is not convenient for painting larger areas.Assuming we’re out to create a desert map, it’s better to start by filling the entire map with sand. Just switch back to the Tilesets window for a moment, select the sand tile and then use the Bucket Fill Tool.
Once we’ve painted some sand, let’s select the Cobblestone terrain. Now you can see the tool in action!
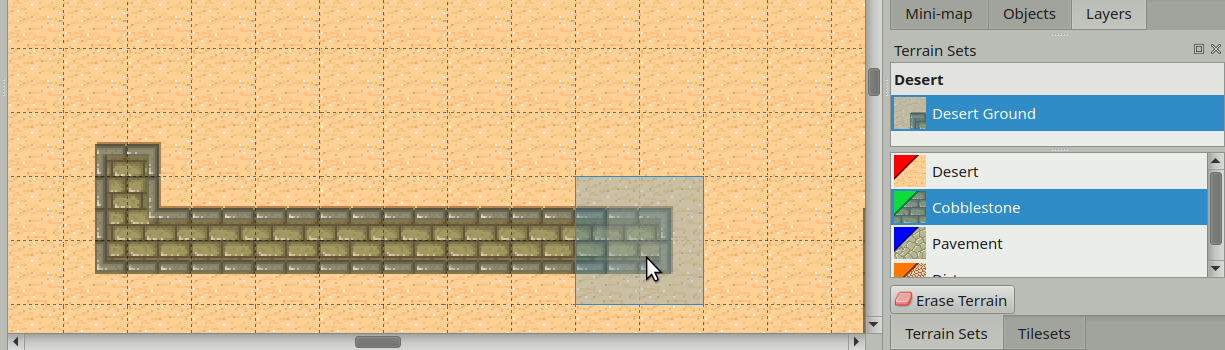
Drawing cobblestone
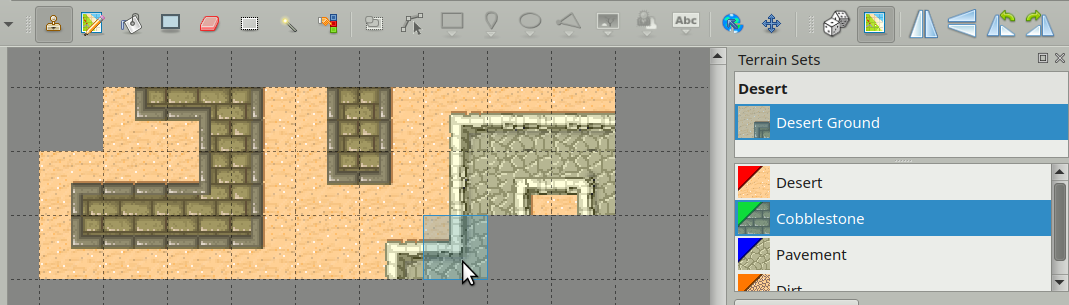
Finally, see what happens when you try drawing some dirt on the cobblestone. Because there are no transitions from dirt directly to cobblestone, the Terrain tool first inserts transitions to sand and from there to cobblestone. Neat!

Drawing dirt
Note
An Erase Terrain button is provided for the case where your terrain tiles transition to nothing. This allows for erasing parts of your terrain while choosing the right tiles as well. This mode does nothing useful when there are no transitions to nothing in the selected Terrain Set.
Terrain Fill Mode
The Stamp Brush, Bucket Fill Tool and the Shape Fill Tool have a Terrain Fill Mode, which can be used to paint or fill an area with random terrain. With this mode activated, each cell will be randomly chosen from all those in the selected Terrain Set, making sure to match all adjacent edges and/or corners.
Stamp Brush with Terrain Fill Mode Enabled
Note that since this mode makes sure that newly placed tiles match up with any already existing tiles, generally nothing will change when painting with the Stamp Brush on existing terrain. The exception is when there are multiple variations of the same tile, in which case it will randomize between those.
Bucket Fill with Terrain Fill Mode Enabled
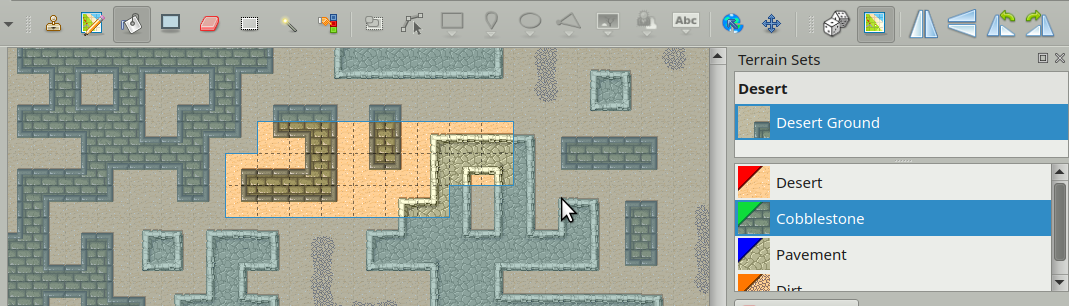
When filling a shape or an area, only the edges of the filled area need to connect to any existing tiles. Internally the area is completely randomized.
Tile and Terrain Probability
Both the Terrain Fill Mode and the Terrain Brush will by default consider all matching tiles with equal probability. Both individual tiles as well as terrains have a Probability property, which can be used to change the frequency with which a certain tile or terrain is chosen compared to other valid options.
The relative probability of a tile is the product of its own probability and the probability of the terrain at each corner and/or side.
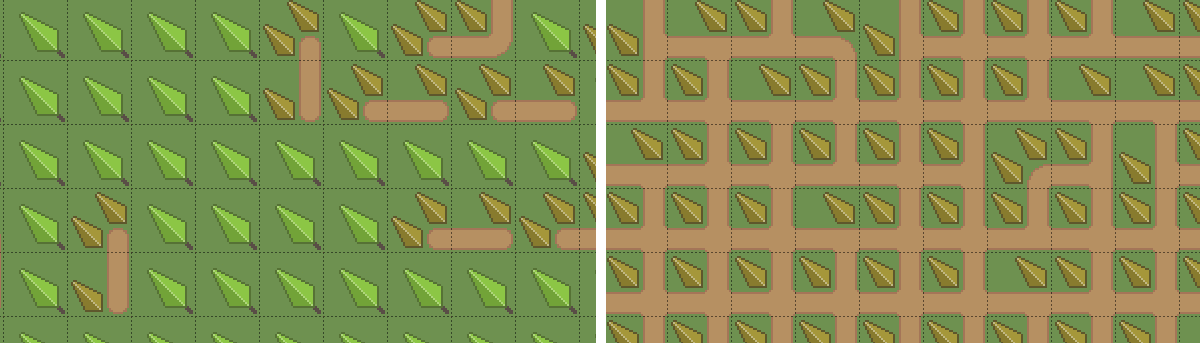
Left shows “path” with probability 0.1, right shows “path” with probability 10.
Probability for Variations
A common usage for probability, especially at the individual tile level, is to make certain variations of a tile less common than others. Our example tileset contains several bushes and other decorations which we may randomly want to scatter across the desert.
To achieve this, first of all we mark all of them as “sand” tiles, because this is their base terrain. Then, to make them less common than the regular sand tile, we can put their probability on 0.01. This value means they are each 100 times less likely to be chosen than the regular sand tile (which still has its default probability of 1). To edit the Probability property of the tiles we need to exit the Terrain Sets mode.
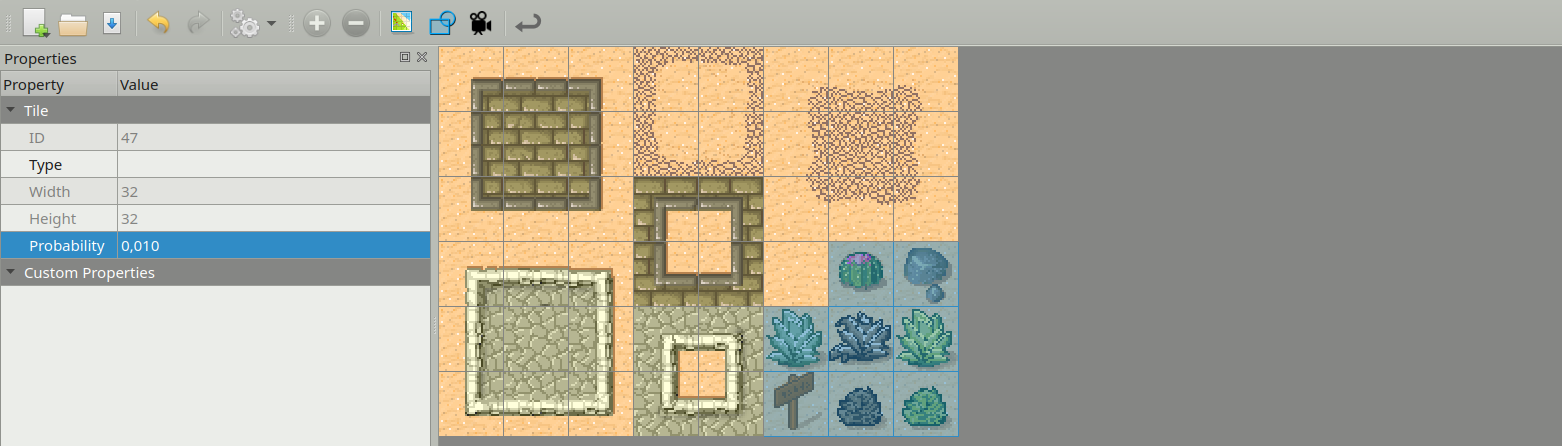
Setting low probability on decoration tiles.
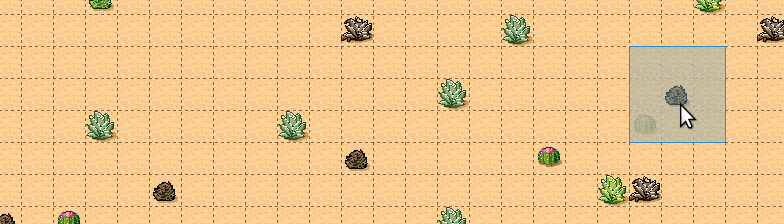
Random decorative tiles appearing with low probability.
Hint
It is also possible to put the probability to 0, which disables automatic usage of a tile entirely. This can be useful because it still makes the tools aware of the terrain of a certain tile, which is taken into account when modifying neighboring tiles.
Tile Transformations
Tiled supports flipping and rotating tiles. When using terrains, tiles can be automatically flipped and/or rotated to create variations that would otherwise not be available in a tileset. This can be enabled in the Tileset Properties.
The following transformation-related options are available:
- Flip Horizontally
Allow tiles to be flipped horizontally.
- Flip Vertically
Allow tiles to be flipped vertically. This would be left disabled when the graphics contain shadows in vertical direction, for example.
- Rotate
Allow tiles to be rotated (by 90, 180 or 270-degrees).
- Prefer Untransformed Tiles
When transformations are enabled, it could happen that a certain pattern can be filled by either a regular tile or a transformed tile. With this option enabled, the untransformed tiles will always take precedence. Leaving this option disabled allows transformations to be used to create more variation.

With rotations enabled, the normally 47-tiles Blob tileset can be reduced to a mere 15 tiles.
Final Words
Now you should have a pretty good idea about how to use this tool in your own project. A few things to keep in mind:
For one terrain to interact with another, they need to be part of the same Terrain Set. This also means all tiles need to be part of the same tileset. If you have tiles in different tilesets that you want to transition to one another, you will need to merge the tilesets into one.
Since defining the terrain information can be somewhat laborious, you’ll want to avoid using embedded tilesets so that terrain information can be shared among several maps.
The Terrain tool works fine with isometric maps as well. To make sure the terrain overlay is displayed correctly, set up the Orientation, Grid Width and Grid Height in the tileset properties.
The tool will handle any number of terrains (up to 254) and each corner of a tile can have a different type of terrain. Still, there are other ways of dealing with transitions that this tool can’t handle. Also, it is not able to edit multiple layers at the same time. For a more flexible, but also more complicated way of automatic tile placement, check out Automapping.
There’s a collection of tilesets that contain transitions that are compatible with this tool on OpenGameArt.org.